FDK HOME
WELCOME TO THE FUN DUBBIN KRIMINALS FORUM.............COME ON IN AND SAY HELLO smile

PLEASE REGISTER TO ACCESS THE CHAT FORUM

Join the forum, it's quick and easy

FDK HOME
WELCOME TO THE FUN DUBBIN KRIMINALS FORUM.............COME ON IN AND SAY HELLO smile

PLEASE REGISTER TO ACCESS THE CHAT FORUM
FDK HOME
Would you like to react to this message? Create an account in a few clicks or log in to continue.

fdk and www.roastietoastie.com

MERRY FUCKIN XMAS FDK MO FO'S

You are not connected. Please login or register

1969..US import Karmann Ghia resto

+8
My left Knacker
Space Monkey
69Busboy
dicky mint
Toastie
paddy
Stereophoney
Mario
12 posters

Go to page : Previous  1, 2, 3, 4  Next

Go down  Message [Page 3 of 4]

Mario

Mario
moderator

decided to hang the headliner today ........

So i bought a good few packs of these for clipping it in place while the glue sets.....
1969..US import Karmann Ghia resto - Page 3 2013-03-09124748_zps421d5e89

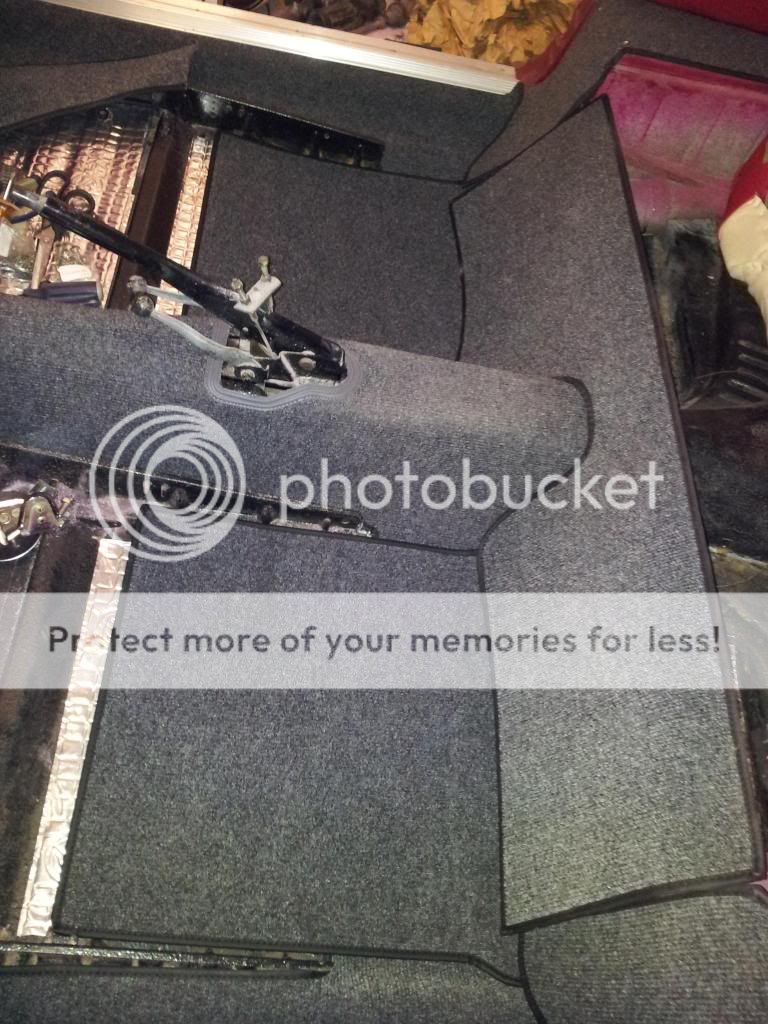
Cleaned up the 4 rods that hold the headliner in place.....
1969..US import Karmann Ghia resto - Page 3 2013-03-09113344_zps469ffbb8
from RIGHT to left....longest rod then 2nd longest and finally on the left 2 the same size.........
order of fitting the rods......
1969..US import Karmann Ghia resto - Page 3 2013-03-09113404_zps4f16f78c


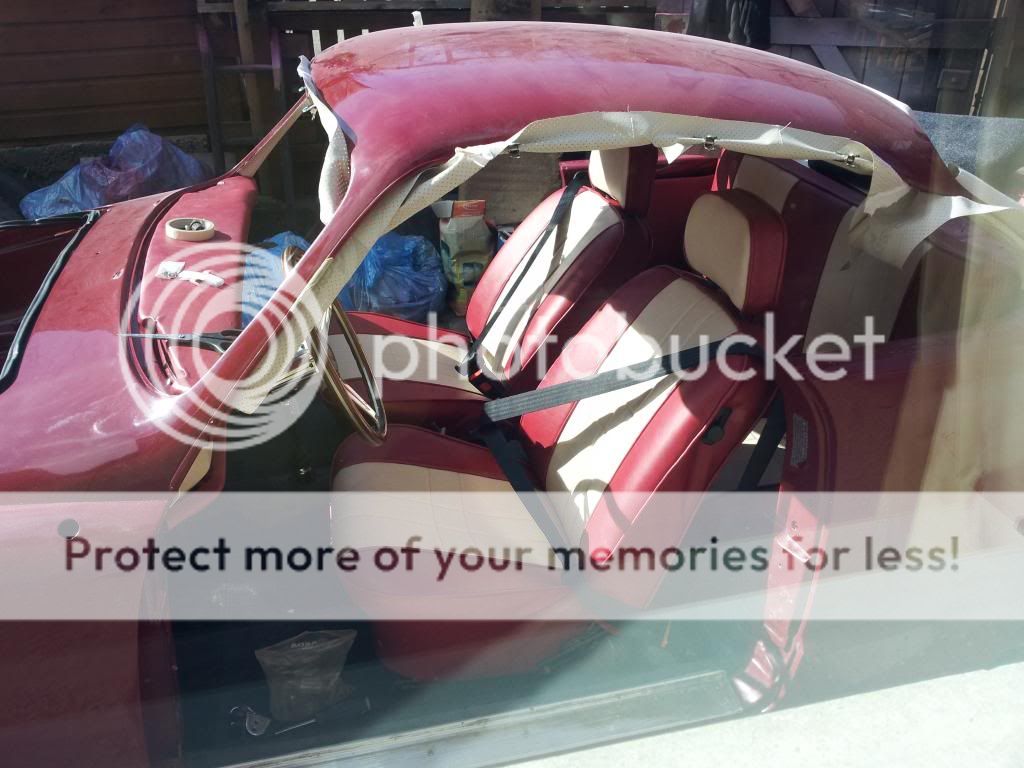
After fitting the 4 rods to headliner i then hung it all in place....
1969..US import Karmann Ghia resto - Page 3 2013-03-09124552_zpsa0bab53f
once in this position i spotted a problem.....
in the next pic i am pointing to the problem.....the rods fit thru a looped material bit on the part of the headliner you wont see..ie the the bit that faces the roof........which stop the headliner moving any further......see pic below
1969..US import Karmann Ghia resto - Page 3 2013-03-09124629_zpsa7acca18

so.to solve the problem i had to carefully snip the material where the rod goes thru......
1969..US import Karmann Ghia resto - Page 3 2013-03-09124717_zps77db3e04

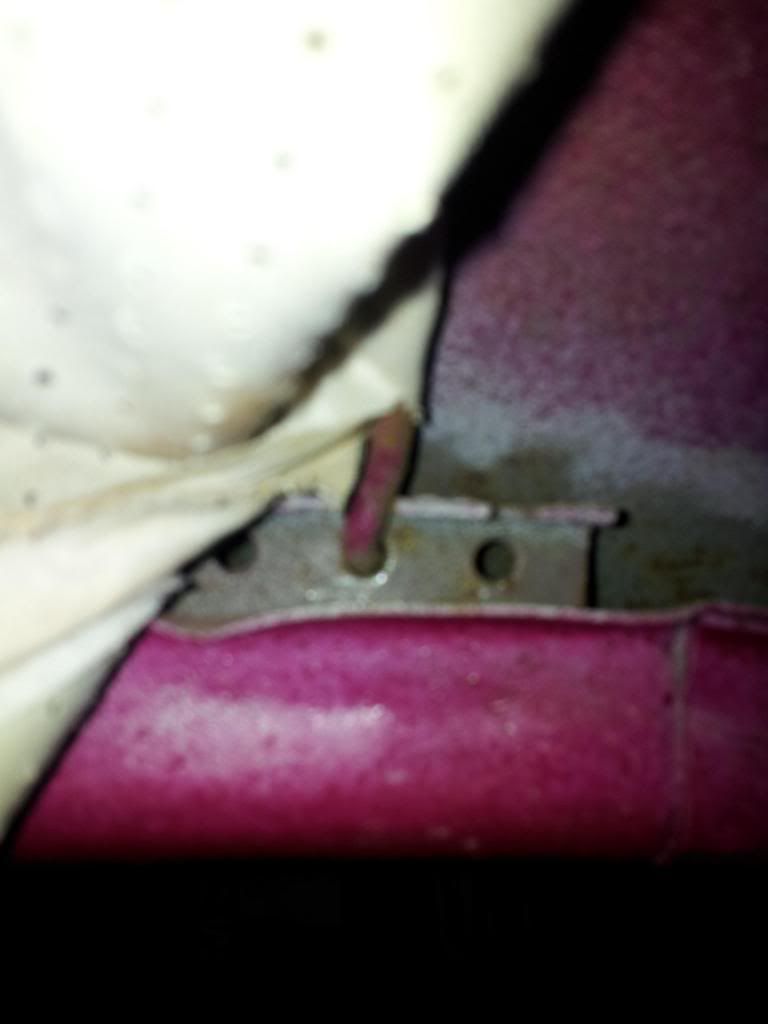
Here ^^^^^^ you can see........the rod....the material where the rod goes thru and which ive snipped and also the bracket which holds the rod........for now i am using the middle position for all 4 rods on both sides of the car.....

Next pic shows the difference AFTER  ive carefully snipped......

1969..US import Karmann Ghia resto - Page 3 2013-03-09124640_zps140d51bd

This final pic shows headliner after ive done all snipping and front and rear are held in place with some of the clips from pic 1.........
1969..US import Karmann Ghia resto - Page 3 2013-03-09130430_zps93c2c3ae

i am just awaiting delivery of some proper upholstery glue which is the brushable kind rather than spray glue...
the spray glue dont hold the headliner to well due to weight..
i will post a pic of it once it arrives......

I will glue the front first........once dried i will then do the rear.....then sides.....
and once it has all dried i will use a hairdryer to help smooth it all out.the hairdryer will soften the glue letting me move the headliner.....well it works in theory:lol:

Mario

Mario
moderator

From this...........
1969..US import Karmann Ghia resto - Page 3 2013-03-14163255_zps6fbd0855

to this after re-fitting steering column........
1969..US import Karmann Ghia resto - Page 3 2013-03-15164445_zpsffdaadd1


and really getting there now......knee pads dash top and steering wheel fitted............Very Happy
1969..US import Karmann Ghia resto - Page 3 2013-03-15165538_zps2d8cefb9
1969..US import Karmann Ghia resto - Page 3 2013-03-15165557_zps0f1ce3ac

Still a long way to go yet,but it is really starting to take shape now.......
And it is nice to finally see the picture i had in my head,way back when i first started this,finally coming to reality:D

Mario

Mario
moderator

not managing to get much done at the mo due to recovering from my knee op,but have managed to do some small bits.
needed to finish off my door cards after re-trim so the kitchen became my trim room:D
1969..US import Karmann Ghia resto - Page 3 2013-03-24100218_zps215af591

door handles before and after.....for those in black n white,the old is at the top:incheek:
next shot show the behind....glue and staples seem to be doing the trick so far....
 1969..US import Karmann Ghia resto - Page 3 2013-03-24100232_zps5936ffcd


and after a bit of a struggle,fitted to the door card.....
1969..US import Karmann Ghia resto - Page 3 2013-03-24120725_zpsf1452a73

just waiting for the other handle to dry out and i will then fit it to the door card...
only other bits ive managed to do is clean up my rear lights and fit new seals....

Mario

Mario
moderator

making some slow progress........both door cards now have the door handles on.............

Dash bits added.....ie clocks n trim n glovebox....
1969..US import Karmann Ghia resto - Page 3 2013-03-26163405_zpsbd1da096
1969..US import Karmann Ghia resto - Page 3 2013-03-26163428_zps4bce1a6d
my chrome bezels on the speedo etc are not very good so i am on the look out for some good condition ones to replace them with...(if you have any for sale drop me a PM;))

bonnet seal placed....
1969..US import Karmann Ghia resto - Page 3 2013-03-26163352_zpsb593416e

and floorpan de-greased,hoovered out and cleaned ready for sound proofing......
1969..US import Karmann Ghia resto - Page 3 2013-03-26163451_zps5f95ef8f

i will add details of the sound proofing when it arrives......


still got the headliner to finish,but, i am not physically able to get into awkward positions at the moment so that is having to wait until my knee eases off...

Mario

Mario
moderator

My soundproofing arrived this morning,so i steamed into get it down on the floor...
Before i start updating tho, if you are looking into doing this,then there are LOADS of products you can use varying in price and there are lots of opinions on the subject...to be honest i sort of got fed up reading about it and in the end i opted for this stuff..........
Silent Coat ...i ended up getting it off ebay as it had free postage..which was good cos this stuff weighs a fucking LOT....i got two packs containing 20 pieces in each pack....£79.99 is what i paid.

1969..US import Karmann Ghia resto - Page 3 2013-03-27092503_zps7b881915

This is what it looks like out of the pack...just pull the white backing off and stick it down...........
1969..US import Karmann Ghia resto - Page 3 2013-03-27094752_zps1c9c1e9b

The stuff is really easy to lay down,cuts easy. I also had the wife's hair dryer to heat it up being as it was cold outside.....
Here's the floor done...........
1969..US import Karmann Ghia resto - Page 3 2013-03-27104936_zps6a8ff29f
ONE PACK was enough to cover............The floor under rear parcel shelf(in front of the engine firewall) and put in one piece each side of where my rear door cards will fit...
hopefully tomorrow i can get onto fitting the carpet set into the rear of the car...

Mario

Mario
moderator

If you have NEVER fitted the carpets to a ghia before,like myself,then BE PREPARED.........it IS an arse of a job !!!!!!!!
Ive been going TWO days(ish) so be prepared for it to take a while,you will NOT do this in a couple of hours............


Any how,my progress so far..................
I spent most of yesterday and this morning trying to get the rear arch carpets to fit.............i gave up......unless you have a steamer to steam and then stretch and pull them,you are in for a hard time....
So, mine got thrown out of the car.............
1969..US import Karmann Ghia resto - Page 3 2013-03-28162928_zps2c74d557

ONLY because i was lucky enough to have this stuff in my garage.....
1969..US import Karmann Ghia resto - Page 3 2013-03-28162936_zps4379fd3a
My son bought this a few years ago but never used it....i was always gonna bin it but for some reason i didnt.....THANK FUCK .....because...
It only matches my new carpet set:lol:
sooooo,
1969..US import Karmann Ghia resto - Page 3 2013-03-28133430_zps3c41946e

Yes yes i know......i'm a jammy bastard:D

As you can see up there^^^^ i fitted the main rear carpet too..

Next up the tunnel...........
1969..US import Karmann Ghia resto - Page 3 2013-03-28133445_zps1a585408

I then moved onto sorting out my rear seat back rest....this needs the carpet fitting to it aswell.......
take note....when you fit this piece it overlaps from the seat back and then lines up with the rear carpet
1969..US import Karmann Ghia resto - Page 3 2013-03-28162852_zps91009f73
i also rested in my rear door card just to see how it will look ^^^^^
and from the other side..............
1969..US import Karmann Ghia resto - Page 3 2013-03-28162905_zps15fa6f8a

You will need to make sure you have some STRONG adhesive/glue for the fitting.........
and a tip for first timers............brush on your glue to the area AND the carpet...........then leave it for a few minutes air rest then stick down the piece of carpet......
giving it an air rest gives the glue chance to work and you will find it sticks quicker............( i was waiting approx 5 mins)
thats me for today....hopefully progress some more tomorrow

Mario

Mario
moderator

Bit more progress made today.......altho it dont look like much:lol:
Both heater channel carpets fitted...and arm rest areas of the back seat screwed down...
1969..US import Karmann Ghia resto - Page 3 2013-03-29134854_zps5f62c9b6

then dropped in my back seat to start seeing how its gonna looksee...
1969..US import Karmann Ghia resto - Page 3 2013-03-29135452_zps2ea45c02

aaaaand ive a problem or two.....
1. Due to my lack of knowledge of ghia's i dont know what is supposed to fit between where the back seat rest meets the bit you sit on....a nice dirty gap.....
2. I dont know how my back seat is supposed to be held in the up right position.......
so a bit of research is needed,unless any of you folk can help me????

Any how next up,the bit of carpet im dreading.....
and its the bit ive rested in front of the back seat area.......
 1969..US import Karmann Ghia resto - Page 3 2013-03-29144256_zps9b218ee3
i feel this will take  a good bit of glue,patience and some screws....and even maybe the odd swear word to help it along:lol:

and this is how it looks with the rear carpets fitted along with the rear seat..........
1969..US import Karmann Ghia resto - Page 3 2013-03-29144342_zps921bfaf3
ive decided im gonna use some of the material i used on the arches,to do the sides of the rear seat area.....hopefully it should tie it in nicely........
i'm hoping to have it all done n dusted tomorrow....fingers crosssed:D

Mario

Mario
moderator

Back on it today and managed to get a good bit done,even with a hangover:o

Needed to get this piece glued on...the grey bit leaning against the back seat area.....
1969..US import Karmann Ghia resto - Page 3 2013-03-29144256_zps9b218ee3

so out came da glue and g cramps and anything i else i could use to cramp the carpet in place......
1969..US import Karmann Ghia resto - Page 3 2013-03-30110908_zps29fc0b75

Also i decided to re-trim the edge of the seat area......the bit in red above g cramp.....
1969..US import Karmann Ghia resto - Page 3 2013-03-30111018_zpsc8cf0107

which then left it all looking like so,
1969..US import Karmann Ghia resto - Page 3 2013-03-30125343_zpsa1c52c36

Mario

Mario
moderator

Next up i moved onto the heater channel front ends (the heater channel carpet comes in two bits) then the front arches and then the front bulk head and finally all carpet mats......leaving it like this............

1969..US import Karmann Ghia resto - Page 3 2013-03-30125220_zpsf70b2404
1969..US import Karmann Ghia resto - Page 3 2013-03-30123307_zps906253ac
1969..US import Karmann Ghia resto - Page 3 2013-03-30125417_zps1d9482e8


So, ALL carpets in and glued.....altho i still need to sort that area between the 2 parts of the back seat......

I have already fitted my front seats but im not happy with a couple of bits on the mechanism for moving the seats up n down the rail,so i will whi[p em off tomorrow and fix and then re-fit and get pics with seats fitted and the car outside(if its dry)

hopefully will get the seat belts started tomorrow.....

aaand finally ive stripped the front of the headliner off again as im not happy with how it had gone in and was adjusting...so square one with that........lol

*EDIT*....just remembered,ive still rear door cards to finish fitting too

Mario

Mario
moderator

Tis a glorious day up here today so i decided to push the ol girl outside and work in the SUNSHINE :eek:

front seats were first on the list today.....so me n the mrs got em in...
1969..US import Karmann Ghia resto - Page 3 2013-03-31105808_zps7dfc34ea
and some more pics from a few different angles...

1969..US import Karmann Ghia resto - Page 3 2013-03-31104406_zps8acdb7c8
1969..US import Karmann Ghia resto - Page 3 2013-03-31104350_zps19488592
1969..US import Karmann Ghia resto - Page 3 2013-03-31104308_zps21694ad7

Next up was fitment of the seat belts......
1969..US import Karmann Ghia resto - Page 3 2013-03-31142028_zps45ea26fa

and then the nostrils and front badge.....
1969..US import Karmann Ghia resto - Page 3 2013-03-31142055_zps9921f3dc


mmmmm gotta go lower yet on the front........
1969..US import Karmann Ghia resto - Page 3 2013-03-31142122_zps08fa1e63

Mario

Mario
moderator

So after all this hard work i better try it for size...........Very Happy

especially considering this would not only be the first time i have sat in MY ghia BUT the first i have EVER sat in ANY ghia:lol:lol

It better fecking fit me:eek:

1969..US import Karmann Ghia resto - Page 3 2013-03-31104506_zps61e3553c

PERFEK Very Happy:D


Altho the offest of the pedals and steering feels more pronounced than in a bug......not that it bothers me......

I'm just chuffed to have finally sat in the feckin thing:D

Mario

Mario
moderator

im awaiting a large order of seals etc so it has held me up on the pop out fitting front......how ever i have been making good steady progress...

Rear window/trim fitted.......this was a pain of a job,did it on my own in about 2 hours......you are supposed to fit the seal and trim to the glass and then fit all at once...didnt work for me as the trim and seal are aftermarket and the trim was forced out when i fitted it all to the car,so i had to fit trim afterwards......still not happy with the fit so it may come out again........
1969..US import Karmann Ghia resto - Page 3 2013-04-12132815_zps37199be3

Next up ffront screen....an absolute piece of piss to put in...same technique as for rear screen......literally it was in,in under 20 mins :eek:
1969..US import Karmann Ghia resto - Page 3 2013-04-12132745_zpscc000f0c

Next up the bonnet............the wife gave me a hand with this.....
1969..US import Karmann Ghia resto - Page 3 2013-04-12132734_zps53810088

Engine lid........
1969..US import Karmann Ghia resto - Page 3 2013-04-12132618_zpse8985448
1969..US import Karmann Ghia resto - Page 3 2013-04-12132637_zps4a9f7ad7
A few more of the car....

1969..US import Karmann Ghia resto - Page 3 2013-04-12132715_zps78fddb79
1969..US import Karmann Ghia resto - Page 3 2013-04-12132703_zps60b50cc4

Back end of the car is full wired up and lights fitted...
Im having brand new headlight looms made so hope to get them in end of next week...
Soon as i get my order of seals in...door glass will go in,then i will gap the doors.......pop out will get finished....
and then its front end wiring........

Ride height and suspension to set.......

so. i am getting REALLY close now to finishing:D:D

And i gotta say,i absolutely love the look and the way she has turned out...ive really fallen for the cherry red...

Mario

Mario
moderator

6 (or was it 7:mad:lol) days to get my pop out seals and windows in......feckin what a nightmare of a job to do.....in and out in and out,but i got there......just lol
1969..US import Karmann Ghia resto - Page 3 2013-04-20132727_zps2cbe6c4d

Also ive been doing those little crappy jobs that seem to take for ever to get done......so rather than bore the crap out of you all,i shall just punt a load of pics up for you to looksee at......

1969..US import Karmann Ghia resto - Page 3 2013-04-20132804_zpsd591dde5
1969..US import Karmann Ghia resto - Page 3 2013-04-20132832_zps5e44ffb5
1969..US import Karmann Ghia resto - Page 3 2013-04-20132930_zps6be41802

Mario

Mario
moderator

Managed to get the car further up the driveway so i could get some decent pics from different angles for the first time.....last time she sat on this bit of the drive was 16 months ago when i had her delivered...
1969..US import Karmann Ghia resto - Page 3 2013-04-20133649_zps77cc3d22
1969..US import Karmann Ghia resto - Page 3 2013-04-20133659_zps083dc4ca
1969..US import Karmann Ghia resto - Page 3 2013-04-20133718_zps3ad6de32
1969..US import Karmann Ghia resto - Page 3 2013-04-20133736_zps84911682
1969..US import Karmann Ghia resto - Page 3 2013-04-20133755_zps696a396e
1969..US import Karmann Ghia resto - Page 3 2013-04-20133950_zps30907e17
1969..US import Karmann Ghia resto - Page 3 2013-04-20140852_zps0312000d
1969..US import Karmann Ghia resto - Page 3 2013-04-20140927_zps940ac583
1969..US import Karmann Ghia resto - Page 3 2013-04-20140949_zps775c2e78
1969..US import Karmann Ghia resto - Page 3 2013-04-20141440_zps5b049093

Mario

Mario
moderator

1969..US import Karmann Ghia resto - Page 3 2013-04-20141309_zpsd0cec4c2
1969..US import Karmann Ghia resto - Page 3 2013-04-20141330_zpsdcd11d18
1969..US import Karmann Ghia resto - Page 3 2013-04-20141455_zps4a59e4db
1969..US import Karmann Ghia resto - Page 3 2013-04-20141545_zps81487e97
1969..US import Karmann Ghia resto - Page 3 2013-04-20141530_zps4c0f71bc

Mario

Mario
moderator

If you fancy a read then the full thread with some very usefull tips in it is here...http://www.volkszone.com/VZi/showthread.php?t=754014


I also had to do a full engine strip as it had got full of water !!!! all running sweet now tho:D


MOT 8 am in the morning.............fingers crossed sh goes thru ok:eek:lol

oilyT

oilyT

Good luck for tomorrow mate.smile by the way what was the carpet trick you was told of for blocking down?

Toastie

Toastie
modmin

looks great mate

Mario

Mario
moderator

We az MOT Very Happy:D:D:D

NO advisories and straight thru...so,see ya at Action peeps Very Happy


1969..US import Karmann Ghia resto - Page 3 2013-06-24092012_zps5433bcfc

oilyT

oilyT

woo hoo
looks fucking ace.smile

Mario

Mario
moderator

oilyT wrote:woo hoo
looks fucking ace.smile


Thanks matey Very Happy


i will try n dig out that carpet info for you from my main thread......id not forgotten,just too hyper at the mo and enjoying the feeling of MOT lol

Toastie

Toastie
modmin

fantastic drive

weardybeardy


Nice work Mario - looking forward to seeing this at Action.

Drewster

Drewster

that looks awesome!

Mario

Mario
moderator

weardybeardy wrote:Nice work Mario - looking forward to seeing this at Action.


Cheers matey:D

i am looking forward to seeing everyone at Action.......along with the ghia of course:D

Sponsored content


Back to top  Message [Page 3 of 4]

Go to page : Previous  1, 2, 3, 4  Next

Permissions in this forum:
You cannot reply to topics in this forum